
Clash for Android TV (Android electronic box) Configure the network to watch Netflix and streaming media
Fork of the graphical mobile platform Clash. It is common with Android mobile terminal and TV box, and the graphical display is different when installed on different platforms, but the installation package is the same, and supports SS/V2ray/Trojan protocol.
SETUP 1. Install the software
Clash For Android (cfa) is open source software
- Find the latest version download in NextNet network disk or Github , you can download it according to the processor architecture of your device If not, download the universal program “cfa-x.x.x-premium-universal-release.apk (universal version) and cfa-x.x.x-foss-universal-release.apk (enhanced version)”, It is recommended to download both, as some TV boxes may not be compatible.
✅ This client fully supports our product and has continuous updates.
In addition, some users reported that Clash is not compatible, we found an alternative software of the same type, Surfboard, the method is the same. Download it at NextNet Network Disk .
Location: 📂 for Android ➠ 📂 Surfboard
NextNet Network Disk download cfa Location: 📂 for Android ➠ 📂 cfa
NextNet Network Disk download cfa TV tools software Location: 📂 for Android ➠ 📂 Android_TV
GitHub Download the latest version
SETUP 2. Get subscription address
Log in to Console , select Subscribe ➔ My Subscription , and find the “One-Click Subscribe” button ➔ Copy the subscription address.

Figure 1 Browser input "https://go.nextnet.one" to copy subscription
⚠️ IMPORTANT NOTICE:
All subscription addresses are as important as your password, please do not disclose it to others, otherwise your account may be blocked.
SETUP 3. Android TV box/android TV setup Clash (five steps)
The first step is to install APP File Commander Manager (TV side operation), NessBit network disk provides
To install, copy the File Commander Manager APK file to a USB flash drive. Insert the U disk into the electronic box, and an interface similar to the following figure will pop up by default. Select the APK file to install.

U disk APK package installation
The second step, select and open File Commander Manager (TV side operation) on the remote control, select “Computer File Transfer”

Select computer file transfer

IP address appears
The third step is to use a computer browser (computer-side operation). Access the displayed IP address [Note, enter according to the displayed IP address of the personal TV], as shown in the figure below. In internal storage, create a folder APK for later use.
Upload cfa-x.x.x-premium-universal-release.apk and cfa-x.x.x-foss-universal-release.apk just downloaded to this directory, as shown below.

The APK is uploaded to this newly created directory

The APK is uploaded to this newly created directory

uploaded successfully
The fourth step, go back to the Android TV box (operation on the TV side), open File Commander Manager again, select the “internal storage” - “apk” directory, as shown below
Enter the apk directory and start installing any clash app just uploaded It is supported if it can be installed. If it doesn’t work, go to github to download some other versions and install it. If it doesn’t work, it proves that the TV box doesn’t support it.

Enter the file directory with the apk installation package

Remote control select APK package installation
After the installation is successful, the display is as follows:


Successful installation
The fifth step, open the Clash of the Android box (operation on the TV side), start to configure NextNet, click “Configure” as shown in the figure below
PS: Since there are a large number of inputs, you can also use the remote control to select words one by one, or Bluetooth paired keyboard input.

add subscription
Add configuration, + on the right, select URL, enter the relevant settings as shown in the figure below, after the input is complete, click Save in the upper right corner
- Name NextNet
- Subscribe address, log in to Console , select Subscribe ➔ My Subscription , find “One-click Subscribe” button to copy the subscription.
- Auto-renew 1200 minutes

Select +

URL import subscription
Enter the configuration, and then select Save on the right

input content

Select the configuration just saved and return to the home page

Click to start, run successfully
After running successfully, select “Proxy” to start selecting your own reasonable node

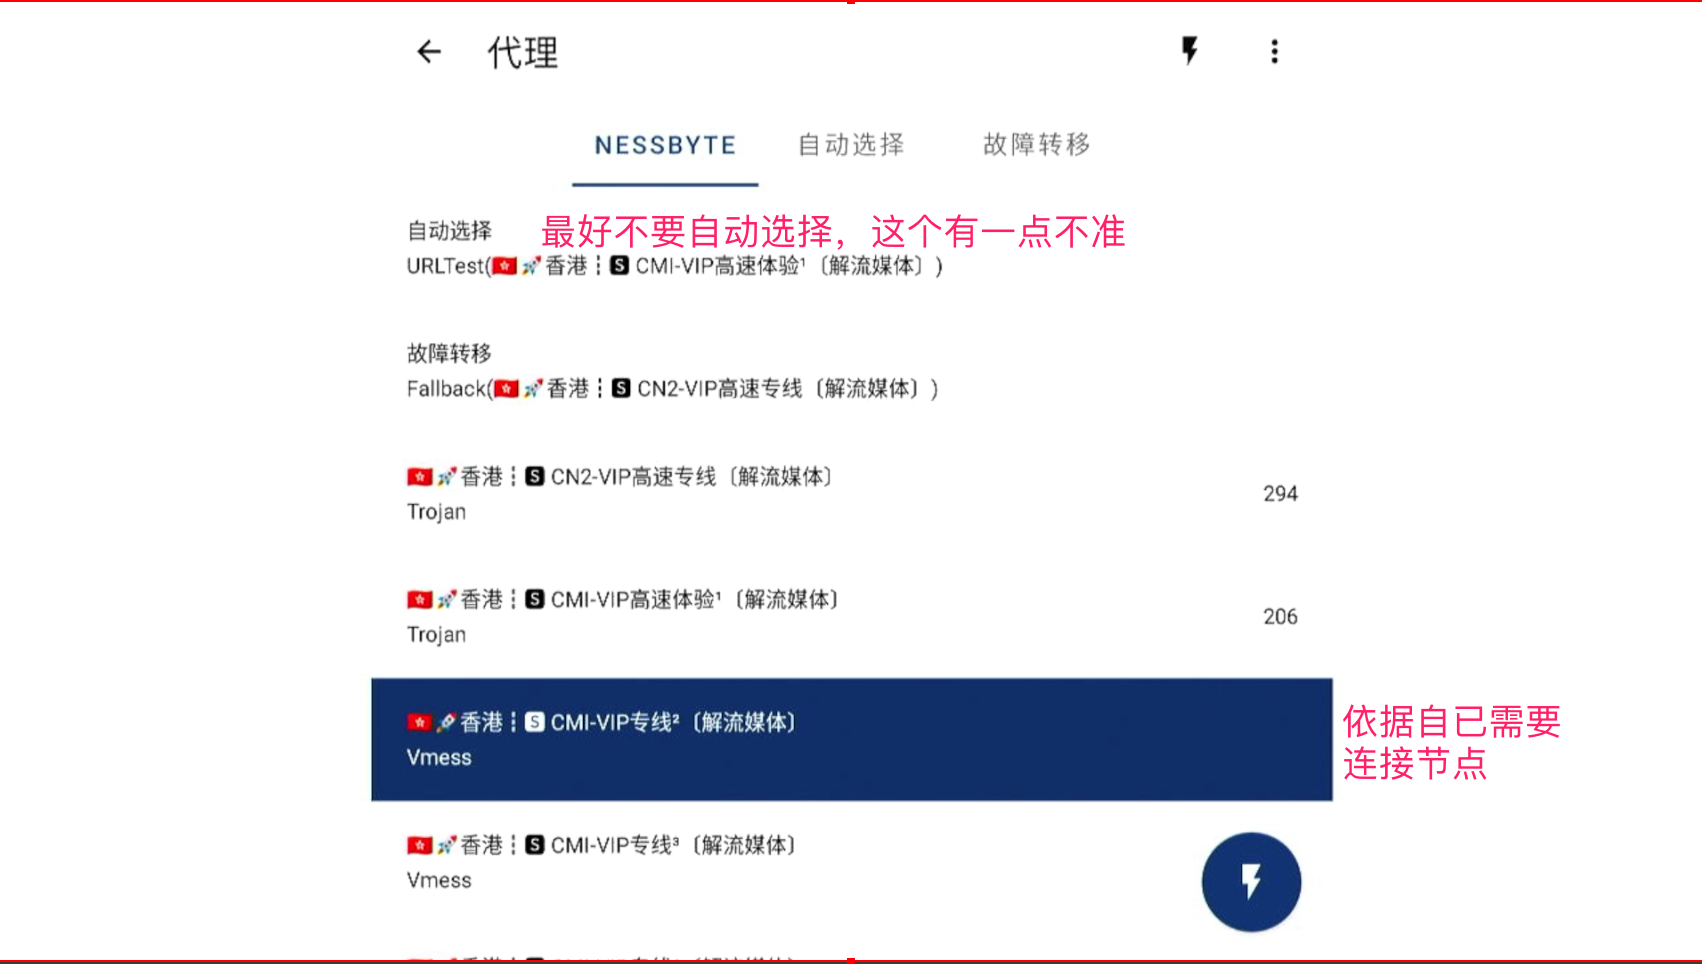
Select a reasonable node configuration successfully
For the TV box, we recommend using NextNet’s special package for streaming media line, exclusive bandwidth and IP, 4K video, unlock streaming media at any time, and do not compete with others for resources.
~ END ~
🍇